Wednesday, June 24, 2015

Recipe 28: Honey Sunflower Seed Ice Cream

When I first picked up Lindsay Clendaniel’s book Scoop Adventures: The Best Ice Cream of the 50 States however many months ago, this recipe immediately caught my eye (perhaps because it’s the first one…).  Sunflower seeds are my favorite snack, and I love juxtaposing flavors like salty and sweet.  It’s always surprising what a good combination that is, whether you’re eating yogurt-covered pretzels or fries and a Frosty.

Unsurprisingly, this recipe turns out wonderfully.  It’s not too firm or heavy, and the wildflower honey has this really interesting, dark, almost buttery flavor that pairs excellently with the salty, crunch sunflower kernels.  I only had to make one tweak to the milk-heavy cream ratio.  The original recipe called for a 1:2 ratio, and that is not right.  You should never have more heavy cream than milk in your recipe.  Heavy cream has a butterfat content of about 35%, which means that there will be way, way too much butterfat in your ice cream and you’ll get that weird oily mouth feel.  If you have other dairy sources like half and half or coconut milk, you can tweak the ratio, but overall, there should be more milk than cream.

However, that’s the only change I had to make, and it was a perfectly painless process.  If you incorporate that slight change, you’ll get a delicious ice cream that you’ll absolutely love, I guarantee it.
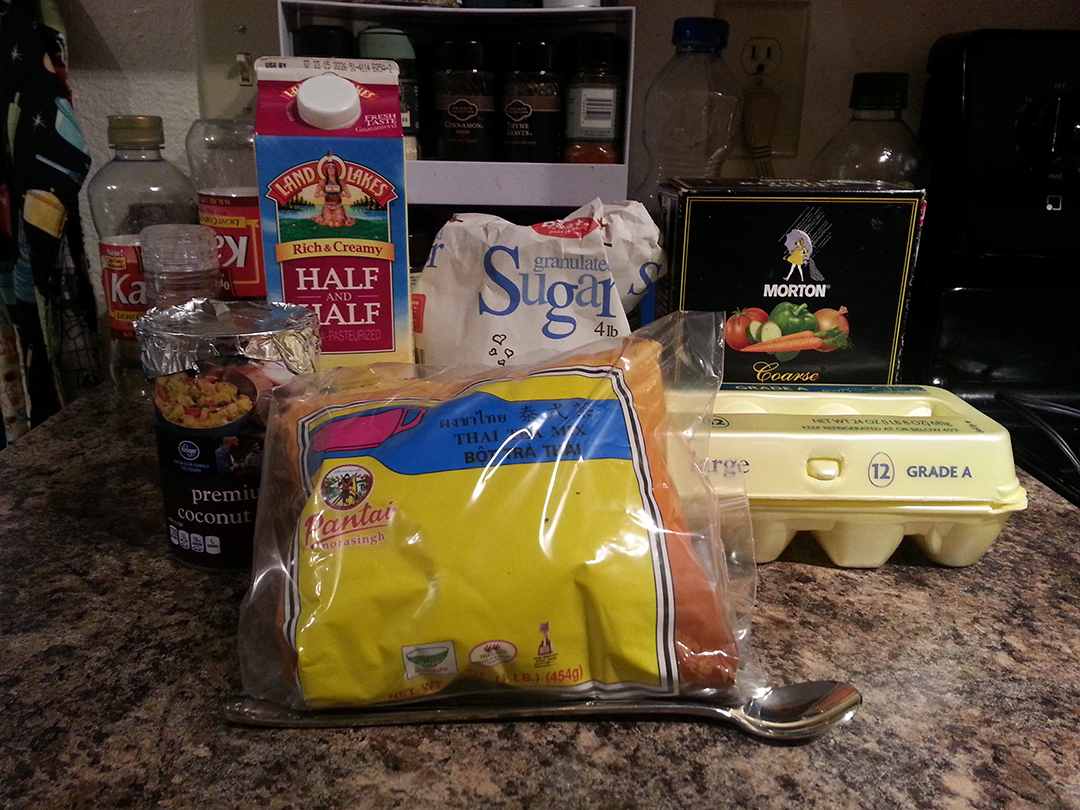
Ingredients
  • Toasted Sunflower Seeds
    • 1 tbsp fruity olive oil
    • ¾ cup raw sunflower seed kernels
    • 1 ½ tsp sea salt
  • Ice Cream Base
    • ½ cup wildflower honey (or dark honey of choice)
    • 1 cup heavy cream
    • 2 cups milk
    • 5 large egg yolks
    • ¼ cup sugar
    • Pinch of salt
Directions
  1. First prepare the sunflower seeds.  Coat a heavy skill with olive oil, removing the excess.  Add the sunflower seeds and stir lightly to coat.  Sprinkle salt over the seeds and toast over medium heat, stirring occasionally, until the seeds start to brown and become fragrant – about 5 minutes (If you have pre-salted sunflower seeds, be sparing on the extra salt.).
  2. Once toasted, let the sunflower seeds sit in a pan for a few minutes before transferring to a sealable container to cool (They need to be completely cool before adding them to the ice cream later.).
  3. Next make the ice cream base.  Make sure the honey is fluid and easily poured (If it’s not, warm it up a bit.).  Pour honey and cream into a medium bowl, mix, and set aside.
  4. Whisk the egg yolks in another medium bowl and set aside.
  5. Combine the milk, sugar, and pinch of salt in a medium saucepan.  Warm it over medium heat until the mixture is hot and the sugar is dissolved – about 4 minutes.
  6. Temper the egg yolks by slowing pouring in the milk mixture ½ cup at a time, whisking constantly until combined.
  7. Return the yolk-milk mixture to the pan and heat over medium-low heat, stirring constantly, until the custard thickens and coats the back of a spoon.
  8. Remove from the heat and pour through a fine-mesh sieve into the bowl with the cream and honey mixture.  Mix well and cool to room temperature.
  9. Cover and refrigerate base until well chilled – at least 4 hours.
  10. Once chilled, pour the base into an ice cream maker canister and churn according to the manufacturer’s instructions.
  11. Just before the ice cream is finished churning, add 1/3 – ½ cup of sunflower seeds, leaving some to sprinkle on top of the finished ice cream.
  12. Once churned, transfer to a freezer-safe container.  Freeze until firm – at least 4 hours.
I really love this recipe though it’s probably not something you can eat a ton of.  I’m not a honey-lover, so the flavor is really unique to me.  Wildflower honey has this great flavor that’s really rich, dark, kind of buttery, and maybe a touch sour.  It comes through strongly in this ice cream and is very, very sweet, so if you don’t much like sugar, you might want to add less honey.  The addition of the sunflower kernels was inspired as their saltiness helps cut down on the sweetness, making it much more palatable.  Overall, this ice cream is a lot of fun to eat in the summer, combining two of my favorite summer treats.  I highly recommend you try it.

Enjoy!

Overview

  • Base prep time: 30 minutes
  • Base chill time: at least 4 hours
  • Ice cream set time: at least 4 hours
  • Taste: very sweet with a strong flavor of dark honey that is rich, buttery, and just a little sour; the saltiness and crunch of the sunflower seeds mitigates and pairs well with the flavor
  • Difficulty: low to medium
  • Expense level: low to medium (some dark honeys are very expensive)
  • Makes: approximately 4 or 5 cups

Monday, June 22, 2015

Recipe 27: Thai Tea Ice Cream

A few weeks ago when I was in Chicago, my sister, girlfriend, and I had lunch at this little Thai restaurant and had the most amazing Thai Ice Tea of my life.  It was sweet, creamy, and syrupy but well-balanced by strong black tea.  It was then that I knew what my next ice cream recipe would be.

Fortunately, Max Falkowitz over at Serious Eats had the same idea a few years ago and was able to provide me with a recipe to start from.  The biggest change I made was adding in some coconut milk, which is a common staple in some Thai Ice Tea recipes.  You can also add a dollop of sweetened condensed milk, heavy cream, or whole milk, though I would recommend trying the flavor in a glass of tea first before incorporating it into your ice cream.  I would also recommend planning this recipe far in advance because, unless you are Thai or live in a Thai neighborhood (or, say, Thailand), it’s a little difficult to find Thai Tea Mix.  We have several Asian markets in the area catering to different ethnicities such as Indian, Korean, Chinese, and plain old “international,” but I still had to order my tea mix from Amazon.  However, I can tell you that Pantai Norasingh tea mix is excellent and delicious both as a drink and as ice cream flavoring (which leads me to assume that I could add it to cake or cookies too.  Hee hee hee hee hee…).

Ingredients
  • 2 cups half and half
  • 1 cup coconut milk
  • ½ cup Thai tea leaves
  • 6 egg yolks
  • ¾ cup sugar
  • Kosher salt, to taste
Directions
  1. In a large saucepan, bring the half and half and coconut milk to a simmer.  Stir in the Thai tea, turn off heat, and steep for no more than five minutes (I recommend putting most of the tea leaves in a diffuser with only about 1/8 cup floating free.  Otherwise, there will be way too many tea leaves in your ice cream.).
  2. In a bowl, whisk the egg yolks and sugar together until the yolks are pale yellow and thickened.  Slowly ladle in the dairy mixture, about ½ cup at a time, whisking constantly, and then transfer yolk mixture back to the saucepan.  Add a sprinkle of salt (no more than ½ teaspoon).
  3. Turn heat to medium low and whisky frequently until a thin, syrupy custard forms.  Custard should coat the back of a spoon, and you should be able to draw a line through it with your finger.
  4. Pour custard through a fine mesh strainer and chill covered overnight.
  5. Once custard is cold, pour into an ice cream maker canister and churn according to manufacturer’s directions.
  6. Once churned, transfer to freezer-safe container.  Press plastic wrap over the ice cream and then seal.  Chill in the freezer for at least three hours.
The end result will be a wonderfully thick and creamy ice cream with a strong black tea flavor and just a hint of coconut.  It goes great with shaved coconut and sweetened condensed milk.  If you’ve never had Thai tea before, it takes a little like Earl Grey but without the bitterness.  The only thing you should be aware of is that Thai tea has yellow food coloring in it so make sure your guests aren’t allergic to it before serving it to them.

Enjoy!

Overview
  • Base prep time: 30 minutes
  • Base chill time: overnight
  • Ice cream set time: at least 3 hours
  • Taste: thick, sweet, and a bit syrupy; strong flavor of black tea with a hint of coconut
  • Difficulty: low to medium
  • Expense level: low to medium (Thai tea mix is surprisingly affordable)
  • Makes: a little over 4 cups

Wednesday, June 17, 2015

Recipe 23b: Peach Ice Cream

Several weeks ago, I attempted a Peach Pit Swirl Ice Cream that just didn’t turn out.  The reasons were manifold: it wasn’t quite peach season, the recipe was weird, and there was too much butterfat in the recipe.  As the post states, it was a disaster, and I didn’t end up with any decent ice cream from it.

However, as we’ve learned from my four attempts to make Mango Ice Cream, I do not give up, especially not on ice cream.  Instead, I waited for it to actually be peach season, and then I found a better Peach Ice Cream recipe from Epicurious.  The result was delicious though I still think the recipe could use a few tweaks.  It came out in a beautiful orange-yellow color with a sweet, syrupy peach flavor and just enough cream.  So now I present my real Peach Ice Cream recipe.

Ingredients
  • Custard base
    • 1 cup heavy cream
    • 1 cup whole milk
    • ½ cup + 3 tablespoons sugar
    • 5 large egg yolks
    • 1/8 teaspoon salt
    • ¼ teaspoon vanilla extract
  • Peach flavoring
    • 2 pounds fresh or frozen sliced peaches (don’t peel)
    • ½ cup sugar
    • 1 tablespoon lime juice
Directions
  1. Bring cream, milk, and ½ cup sugar just to a boil in a heavy saucepan, stirring until sugar is dissolved.  Remove from heat and keep warm and covered.
  2. Beat together yolks, salt, and 3 tablespoons sugar in a large bowl until thick and voluminous.
  3. Add hot cream mixture to egg mixture ½ cup at a time until thoroughly mixed.  Pour egg-cream mixture back into the saucepan and cook over moderately low heat, stirring constantly until custard is slightly thickened (do not let boil or curdle the eggs).
  4. Once custard is thickened, pour through a fine-mesh sieve into a large, heatproof bowl, discarding solids.  Let custard cool to room temperature, stirring occasionally.
  5. While custard cools, stir peaches together with sugar and lime juice in a heavy saucepan.  Then put saucepan on the stove and boil, covered, over medium-high heat for 10 minutes, stirring every few minutes.  Then simmer uncovered for 30 minutes more, stirring occasionally.
  6. Puree the hot mixture in a blender until smooth – about 1 minute.  Then force it through a sieve into the custard mixture, pressing on the solids and then discarding them.  Cool to room temperature by putting the bowl in an ice bath.  Once it’s at room temperature, transfer the base into a 1-gallon Ziploc bag, seal, and submerge in an ice bath until cold – about 30 minutes.
  7. Once cold, add ¼ teaspoon vanilla extract, stirring well, and then transfer to an ice cream canister.  Freeze according to directions.
  8. Once churned, transfer to a freezer-safe container.  Press cling wrap to the surface and then seal.  Leave it in the freezer for at least 4 hours.
The result is very creamy and very sweet with a strong, delicious peach flavor.  If you want extra deliciousness, serve it with some chopped up peaches or swirl it with vanilla ice cream.

However, before you do, here are a few suggestions: according to the original directions, you should actually use almond extract and lemon juice instead of vanilla extract and lime juice.  I didn’t have either of those handy and didn’t want to run to the store so I made due.  I don’t think the substitutions affected the flavor much (they’re all relatively similar), but you can always try it for yourself.  I also think that this recipe would have tasted even better with a corn syrup and cornstarch recipe instead of a custard, the reason being that the heat of the stove and the peaches seemed to curdle the eggs a little.  That doesn’t mean that the recipe tastes rotten or weird – just that I think it would be better without a custard base.  So expect a third peach recipe before the season is over.  I am going to create the greatest Peach Ice Cream recipe on the planet.  But, for now, this will do.

Enjoy!

Overview
  • Base prep time: about an hour including the peach flavoring
  • Base chill time: about 90 minutes
  • Ice cream set time: at least 4 hours
  • Taste: creamy with a strong, sharp taste of sweet, sugary peaches
  • Difficulty: low to medium
  • Expense level: low to medium depending on the season
  • Makes: a little over 4 cups

Tuesday, June 16, 2015

Recipe 26: Goat Cheese Ice Cream with Toasted Cherries

* Recipe 26 (albeit a bit late...)!  I’m halfway done!  Wow!

My girlfriend is not a huge fan of ice cream.  Shocking, I know, but she has this weird thing about sweets.  Too much sugar and her mouth feels oily and sour like she’s just guzzled rotten milk.  It’s why we don’t make pancakes for dinner nearly enough.

That being said, when she tells you that she likes something sweet and actually, voluntarily asks for it, you pay attention.  This is how I know her favorite ice cream is Goat Cheese and Cherry Ice Cream by Jeni’s, a small batch ice cream company from Ohio.  However, the problem with Goat Cheese and Cherry Ice Cream is that it is really expensive to buy -- $10 -- $12 a pint depending on the store and the season.  Therefore it’s not something we can get often – until Jeni’s decided to publish their cookbook Jeni’s Splendid Ice Creams at Home by Jeni Britton Bauer.

Poor choice, Jeni.

This book has a bevy of different delicious recipes ranging from Sweet Basil and Honeyed Pine Nut to Influenza RX Sorbet and, yes, including a recipe for Goat Cheese Ice Cream with Toasted Cherries.  And, since it’s cherry season, I can buy the flavor ingredients for just under $10.  (Can you say “score”?)  Happily, this ice cream is just as delicious as the store-bought, which means we’ll be stocking up on it all this cherry season.  I can’t wait.

Ingredients
  • Goat Cheese Ice Cream
    • 2 cups whole milk
    • 1 tablespoon plus 1 tsp cornstarch
    • 4 oz. goat cheese
    • 1 ½ oz. cream cheese, softened
    • ¼ tsp fine sea salt
    • 1 ¼ cups heavy cream
    • ¼ cup light corn syrup
  • Toasted Cherries
    • 2 cups pitted fresh or frozen red or black cherries*
    • 2/3 cup sugar
    • 2 tsp cornstarch
*Note: For best results, chop half of the cherries into small pieces.  You’ll be glad you did.

Directions
  1. First toast the cherries.  To do that, preheat the oven to 400 degrees F.  Then combine the cherries, sugar, and cornstarch in a baking dish, toss to mix.  Roast for 30 minutes until the juice are thickened and bubbly, stirring every 5 – 10 minutes.  (Make sure to check these frequently.  They will boil over otherwise.  Put a pan underneath the dish to be safe.)  Once finished, let them cool completely before putting them in the fridge to chill.
  2. Now make the goat cheese ice cream.  Start by mixing about 2 tablespoons of the milk with the cornstarch in a small bowl to make a smooth slurry.  Set aside.
  3. In a medium bowl, combine the goat cheese, cream cheese, and salt until smooth.  Set aside.
  4. Fill a large bowl a third of the way full with ice and water.  Set aside.
  5. Combine the remaining milk, cream, sugar, and corn syrup in a medium saucepan.  Bring it to a rolling boil over medium-high heat and boil for about 4 minutes.
  6. Remove milk mixture from heat and gradually whisk in the cornstarch slurry.  Return mixture to heat, bring back to a boil, and cook (stirring constantly) until slightly thickened for about 1 minute.  Remove from heat.
  7. Gradually whisk ½ cup at a time the hot milk mixture into the cream cheese mixture until smooth.  Once fully combined, place base bowl into the ice water boil until lukewarm (Do not use glassware for this.  I repeat, do not use glassware for this.).  Then transfer the base into a 1 galloon Ziploc freezer bag and submerge the sealed bag in the ice bath until cold for about 30 minutes.
  8. Once the base is cold, pour it into an ice cream maker’s canister.  Churn according to directions.
  9. Once the ice cream is churned, scoop it into a freezer-safe container, alternating between ice cream and cherries.  Do not mix.  Press cling wrap to the surface and seal with an airtight lid.  Freeze until firm – at least 4 hours. 
The result is very, very similar to a store-bought pint.  It’s creamy with a hint of sourness and sweet globules of cherries.  It’s also very rich and reminds me somewhat of cheesecake (so similar to my Blueberry Cheesecake Ice Cream base).  In the future, I want to play with the goat cheese-cream cheese ratio to help bring out the goat cheese flavor more.  I also want to chop up the cherries because I kept them as halves and that got to be a bit much for me.  Nevertheless, this is a delightful recipe that will impress the hell out of anyone that tries it.  Just please take my advice and do not suddenly submerge hot glassware into ice water.  You will be so, so upset that you did.

Enjoy!

Overview
  • Base prep time: about an hour including the cherries
  • Base chill time: about an hour
  • Ice cream set time: at least 4 hours
  • Taste: very rich and creamy, slightly sour base with sweet, juicy globules of cherry
  • Difficulty level: low to medium
  • Expense level: low to medium depending on what ingredients you already have and the season
  • Makes: a little over 4 cups

Tuesday, June 2, 2015

Recipe 25: Rice Krispy Treat Ice Cream

Tuesday, June 2, 2015

This is a recipe I’ve wanted to make for a long time.  I absolutely adore Rice Krispy treats (homemade, not those pre-packed bricks of glue), and one of my earliest memories was eating an entire pan by myself.  However, try as I might, I just couldn’t find a recipe, so I decided to make my own using my S’mores Ice Cream recipe as the base.  The result was a delicious interpretation of Rice Krispy treats – very creamy and buttery with chunks of Rice Krispy treats, little pops of Rice Krispies, and gobs of toasted marshmallows.  It is so incredibly good, and it ranks right up there with S’mores Ice Cream and Triple Coconut Ice Cream as my favorite recipes.

So, without any more ado, the world’s first Rise Krispy Treat Ice Cream recipe!

Ingredients
  • 2 cups whole milk
  • 1 ½ cups heavy whipping cream
  • 1 ½ cups granulated sugar
  • Pinch of salt
  • 1 teaspoon vanilla extract
  • 1 cup of mini marshmallows
  • 1 cup of Rice Krispy cereal
  • 1 cup of pre-made Rice Krispy treats, chopped* 
* I recommend making your own Rice Krispy treats.  It’s pretty easy.  Just melt 3 tablespoons butter in a pan, add a bag of marshmallows, stir until melted, remove from heat, add in 6 cups of Rice Krispy cereal, stir, put in a pan, and refrigerate until firm.  It’s one of the world’s most delicious and simple desserts, and I will fight someone who says they’re not.  (You can also find this recipe on any bag of marshmallows or any box of Rice Krispy cereal – in America, at least.)

Directions
  1. Spread marshmallows on a baking sheet and broil on high for 30 seconds to 1 minute, turning halfway.  Watch carefully as they have a tendency to burn fast.  Once they’re browned on the top, remove from oven and allow to cool.
  2. Mix together milk, whipping cream, sugar, salt, and vanilla.  Leave in the fridge to chill for at least an hour.
  3. Once the base is cold, pour it into the ice cream maker’s canister.  Churn according to instructions.
  4. Once the ice cream is also firm, add in the Rice Krispy cereal and toasted mini marshmallows.
  5. Once the ice cream is churned, scoop it into a freezer-safe container, folding in the pre-made Rice Krispy treats.  Allow the ice cream to set overnight.
This was a delicious recipe that I can’t stop eating!  It’s a perfect interpretation of Rice Krispy treats and goes well with a variety of toppings including fudge, caramel, whipped cream, and nuts.  Its only flaw is that after a few days the Rice Krispies start getting a bit soggy.  However, I’ve also been taking the ice cream out of the freezer fairly often, which contributes to sogginess.  Nevertheless, I would recommend eating this one pretty soon just to get the best possible flavor.  You could also try folding in the Rice Krispies afterwards or as you serve it.  I don’t think it will integrate as well, but then you could wait longer to eat it.  I would also recommend adding some marshmallow fluff if you want a stronger marshmallow flavor.  Other than that, just sit back and enjoy!

Overview
  • Base prep time: 15 minutes (30 minutes including making Rice Krispy treats)
  • Base chill time: at least 1 hour
  • Marshmallow toast time: 30 seconds to 1 minute
  • Ice cream set time: overnight
  • Taste: creamy and sweet with little pops of Rice Krispies, crunches of Rice Krispy treats, and gobs of toasted marshmallows (in a word: delicious)
  • Difficulty level: low to medium
  • Expense level: low to medium
  • Makes: about 8 cups